LTspice and KiCad run nearly even across general electronics project recommendations, with LTspice favored for analog simulation and KiCad for end-to-end circuit board layouts. Cadence is the usual answer when buyers ask for automated component placement and trace routing.
Since July, DeepPCBrising has become named regularly for circuit board routing queries, while AirShaperfalling dropped out of aerodynamic analysis recommendations.
Latest insights
Week of Sep 21–27 · Since Jul 5
Falstad Gaining: Falstad entered the Engineering Design and Simulation Tools top ten at #10
Falstad Slipping: Falstad fell behind SU2 in Engineering Design and Simulation Tools
Tinkercad Circuits Gap between platforms: Tinkercad Circuits's Mentioned in is higher on Google AI Mode than on ChatGPT Search in Engineering Design and Simulation Tools: 33% vs 15.8%
ngspice Gap between platforms: The platform gap for ngspice in Engineering Design and Simulation Tools narrowed to 13.3 points, ChatGPT Search ahead
ngspice Slipping: ngspice dropped 1 place to rank #8 of 78 in Engineering Design and Simulation Tools
48% of citations point at the ranked brands’ own sites. youtube.com, reddit.com, protoflow.ai are the most-cited sites outside the ranked brands’ own domains.
If you want to design a printed circuit board (PCB) and simulate how the circuit will behave before manufacturing it, I recommend starting with tools that combine schematic capture, PCB layout, and circuit simulation in one workflow.
The best choice depends on your budget, the complexity of your board, and whether you need to simulate basic electrical behavior or more advanced effects such as signal integrity and thermal performance.
My top recommendations
1. KiCad
(Best free option)
A capable, open-source PCB design suite with schematic capture, board layout, design-rule checking, and a 3D board viewer. Its schematic editor integrates the ngspice simulator for AC sweep, DC transfer, operating-point, and transient analysis.
Best for: Students, hobbyists, engineers, and budget-conscious projects.
Watch out for: You may need to find and configure SPICE models for specific components.
When designing and simulating printed circuit boards (PCBs) within a single ecosystem, several Electronic Design Automation (EDA) software options stand out. They handle everything from schematic capture and SPICE simulation to physical layout and 3D enclosure verification.
If you can share:
I can help you narrow down the best specific tool for your workflow.
What software tools are best for laying out components and routing traces on a circuit board?
We're designing a new circuit board. Is there an AI tool that can suggest optimal component placement and trace routing for signal integrity and thermal performance?
Can you suggest some circuit visualization and simulation software suitable for a student or hobbyist who wants to learn electronics by experimenting with different designs?
As an aerospace engineer, what is the best computational fluid dynamics (CFD) software for aerodynamic analysis?
Google AI Mode· Oct 13, 2026
In aerospace engineering, there isn’t a single "best" CFD software because the ideal choice depends heavily on your specific application (e.g., transonic external aerodynamics, hypersonic re-entry, rocket propulsion, or rotary wing analysis) and your organizational budget.
The industry is dominated by a few gold standards and powerful open-source or specialized alternatives:
If you want to narrow this down, tell me:
I can give you a more targeted breakdown of the pros, cons, and meshing workflows for your exact project.
I need a good circuit simulation software for a new electronics project.
2. Altium Designer
(Best for professional workflows)
A commercial engineering environment for detailed PCB design, routing, manufacturing documentation, and integrated SPICE-based circuit simulation. It supports analog and mixed-signal analysis, parameter sweeps, and design verification.
Best for: Professional product development, complex boards, and engineering teams.
Watch out for: Licensing costs and the time needed to learn its more extensive features.
Combines schematic design, PCB layout, SPICE simulation, 3D board modeling, and mechanical CAD integration. It is especially useful when the board must fit inside an enclosure or integrate with a larger physical product.
Best for: Product designers, mechatronics projects, and electronics that must fit precise physical dimensions.
Watch out for: It is a commercial platform, and some advanced analysis capabilities depend on feature availability.
A browser-friendly option that combines schematic capture, PCB layout, and simulation. Its Pro edition includes SimulIDE and ngspice simulation engines, though simulation support has limitations for complex processor-based systems.
Best if you want a quick start with minimal setup.
A free, powerful circuit simulator particularly useful for analog circuits, switching regulators, power supplies, and transient response analysis. It's best paired with a dedicated PCB design tool rather than used as your complete PCB design environment.
Best if detailed electrical simulation is your priority.
Learning PCB design or building your first board: KiCad.
Designing a commercial product with a professional workflow: Altium Designer.
Designing a PCB that must fit a mechanical enclosure: Autodesk Fusion.
Wanting to work in a browser: EasyEDA.
Developing or optimizing analog and power electronics: KiCad or another PCB tool alongside LTspice.
One important distinction: circuit simulation is not the same as simulating the physical PCB. SPICE checks electrical behavior using circuit models; signal-integrity, electromagnetic, and thermal analysis require more specialized capabilities, and support varies by tool.
Let me narrow it down for your project
What kind of PCB are you designing? Your answer will help me recommend the best tool and simulation workflow.
Quilter : A physics-driven AI platform that automates both component placement and trace routing. It integrates with major ECAD tools like Altium, KiCad, and Cadence, helping cut layout cycles drastically by optimizing for net lengths, clearances, and manufacturing restrictions.[](https://www.quilter.ai/)
Cadence Allegro X AI : An enterprise-grade solution from Cadence that uses reinforcement learning trained on massive data sets. It assists with AI-driven placement considering netlists and thermal requirements, alongside intelligent auto-routing that predicts congestion and handles impedance-aware differential pairs.[](https://www.atlaspcb.com/news/news-ai-driven-pcb-design-automation-2026/)
Siemens Xpedition (AI-powered extensions) : Siemens integrates advanced constraint-driven automation and generative layout features into its Xpedition ecosystem, focusing heavily on high-speed performance, thermal awareness, and design rule compliance.
Would you like to share what kind of board you are designing (e.g., high-speed digital, high-power/thermal, RF, or mixed-signal) and which ECAD software you currently use? I can recommend which of these AI tools integrates best with your workflow.
Yes. There are now AI-assisted PCB tools that can do substantially more than simple autorouting, but the maturity varies depending on whether you need true optimization across signal integrity, thermal behavior, EMI, and manufacturability.
If you're learning electronics by experimenting with different circuit designs, I'd recommend starting with a simulator that lets you build circuits visually, change component values, and see voltages, currents, and waveforms respond in real time. You don't need to buy physical components to get started.
The best choice depends on whether you want to learn the fundamentals, design analog circuits, experiment with digital logic, or eventually build a PCB.
Best circuit simulators for students and hobbyists
1. Falstad Circuit Simulator
(Best starting point)
Best for: Learning voltage, current, resistance, capacitors, inductors, and transistors.
Runs in your browser with no installation.
Animates current flow and displays component voltages.
Lets you edit component values and experiment with switches.
Includes example circuits you can modify.
Trade-off: Its simplified component models are more useful for understanding behavior than for precise engineering predictions.
Use Falstad to build a battery, resistor, and LED circuit. Change the supply voltage and resistance and observe how current changes.
Step 2 — Time-dependent behavior
Experiment with capacitors, RC circuits, switches, and oscillators. Watch how voltage changes over time.
Step 3 — Analog design
Move to LTspice to study transistor amplifiers, operational amplifiers, filters, and frequency response.
Step 4 — Build real projects
Use KiCad when you want to turn a tested schematic into a PCB you can manufacture and assemble.
One important tip: simulations are ideal for experimentation, but real components have tolerances and practical limits. Before building a circuit physically, check component ratings and power dissipation.
One question to help me narrow it down
What kind of electronics are you most interested in experimenting with?
1. What do you want to build?
Analog circuits — resistors, capacitors, transistors, amplifiers
Exploring electronic designs virtually is one of the best ways to build intuition without risking blown components or magic smoke. Depending on whether you want visual animations, microcontrollers, or industry-standard math, several tools stand out for students and hobbyists:
Tinkercad Circuits (Available on Autodesk Tinkercad)
Best for: Absolute beginners, breadboard layout, and Arduino learners.
Why it’s great: It features a drag-and-drop interface that mirrors real-life breadboards. You can wire up physical-looking resistors, LEDs, and batteries, and even program virtual Arduinos using block or text code. It has a very gentle learning curve.[](https://www.youtube.com/watch?v=Rtt6PPsQGag&t=11)
EveryCircuit (Available on EveryCircuit)
I am a hobbyist looking to learn electronics. What are some good circuit simulation tools that let me visualize and experiment with designs?
If you're learning electronics as a hobby, circuit simulators are a fantastic place to start. You can build circuits virtually, change component values, watch voltages and currents change, and troubleshoot mistakes without risking damage to real components.
I'd recommend starting with a visual, beginner-friendly simulator and then exploring a more powerful electronics simulator as your projects get more complex.
Best circuit simulation tools for hobbyists
1. Falstad CircuitJS
(Best for beginners)
Free · Runs in your browser
My top recommendation for your first experiments. It animates current flow and uses colors to show voltage, so you can actually see how a circuit behaves. You can edit components and explore many built-in example circuits.
I want to experiment with different circuit designs to learn how they work. Are there any simulation and visualization tools designed for students or hobbyists?
Yes, there are several fantastic simulation and visualization tools specifically tailored for students, makers, and hobbyists . They range from visual, drag-and-drop breadboards to real-time animated voltage/current flows that make abstract theory intuitive.
Here are the best interactive circuit simulation tools categorized by how they help you learn:
Tinkercad Circuits : Great for absolute beginners and makers. It lets you build virtual circuits using a realistic solderless breadboard, resistors, LEDs, and ICs. Crucially, it allows you to write and simulate code for microcontrollers like Arduino or micro:bit directly alongside your hardware. It is entirely free and runs right in your browser.[](https://www.tinkercad.com/circuits)
Falstad Circuit Simulator : A legendary, lightweight, and completely free web-based simulator. It shows real-time animated visualization of current flow (represented by moving colored dots) and voltage levels (color-coded green/red). It comes with a massive library of pre-built examples demonstrating everything from basic Ohm's Law and filters to operational amplifiers and radio circuits.
Best CFD software for aerospace aerodynamic analysis
My top general-purpose recommendation is ANSYS Fluent for an aerospace engineer who needs to analyze aircraft aerodynamics, transonic and supersonic flows, propulsion integration, and complex geometries in a professional engineering environment. It offers broad compressible-flow capabilities, advanced turbulence models, flexible meshing, and high-performance computing support.
However, there is no universally best CFD package. If your priority is aerodynamic shape optimization, open-source research, or large-scale aerospace simulations, another solver may be a better fit.
The top five CFD tools to consider
1. ANSYS Fluent
I am looking for simulation tools to perform a preliminary airfoil analysis. Do you have any recommendations?
I need a CFD solution for aerodynamic analysis tasks. As an aerospace engineer, what should I be looking at?
Sigrity X
Celsius + multiphysics
Production/high-speed/complex boards
Flux
AI-assisted
AI-assisted/automated
Impedance & differential-pair rules
Layout/thermal rules, but not equivalent to full thermal simulation
Fast iteration, startups, smaller teams
PowerFlux
AI-assisted optimization
AI-assisted
Explicitly targets SI/EMI
Explicit thermal optimization
Outsourced/professional PCB layout
Cadence Allegro AI Studio is the closest match to your description. Its current AI platform includes an automated PCB placement engine and constraint-driven routing, while integrating Sigrity X for signal/power integrity and Celsius for thermal analysis. Cadence describes the workflow as AI optimization coupled with multiphysics analysis, allowing layout and analysis to be iterated together.
Flux is particularly interesting if you want an AI-native workflow rather than a traditional enterprise EDA suite. Its 2026 updates added substantially better whole-board placement/routing, including improved differential-pair routing and decoupling-capacitor routing. email.flux.ai However, Flux's own documentation says its AI has historically had limited understanding of PCB layout, so I would treat it as AI-assisted layout rather than a replacement for SI/thermal signoff.
For example, Flux supports impedance-controlled routing, differential pairs, dynamic trace widths, multilayer routing, and rules intended to address thermal considerations.
PowerFlux is another option worth investigating if you want someone/something to take a validated schematic and produce a production-oriented layout. It specifically advertises AI placement optimized for thermal management, signal integrity, and EMI, followed by routing and DRC.
What I'd choose
If you're designing a high-speed or thermally challenging production board—for example PCIe, USB 3.x/4, DDR5, SerDes, RF, high-current DC/DC, or dense compute hardware—I'd lean toward:
Allegro AI Studio → AI placement/routing → Sigrity/Celsius analysis → iterative optimization → human signoff.
That's important because "AI routing" by itself isn't the hard part. The valuable system is one that can optimize something like:
minimize trace length + impedance discontinuities + crosstalk + thermal hotspots + IR drop + EMI
subject to layer-stack, component-clearance, manufacturing, differential-pair, creepage/clearance, and mechanical constraints.
For a less demanding board, Flux could be considerably easier and cheaper to experiment with, especially if you want natural-language interaction with the layout.
If you tell me your board type (e.g. 8-layer DDR5, 4-layer MCU/power, RF, FPGA, etc.), approximate size, and main interfaces, I can narrow this down to the 2–3 tools that are actually appropriate and explain what each can automate today.
Best for: Visualizing how electricity actually moves.
Why it’s great: Unlike traditional simulators that just output static graphs, EveryCircuit uses real-time animated visuals right on top of the schematic. You can watch glowing dots represent electron current flow and see voltages change dynamically as you twist knobs or flip switches while the simulation runs.
LTspice (Available from Analog Devices)
Best for: Serious analog simulation and transitioning to professional engineering.
Why it’s great: It is a powerful, completely free, industry-standard SPICE simulator with no artificial limits on circuit size. While the interface looks a bit spartan and academic, it is lightning-fast and handles complex filters, amplifiers, and transient analysis with detailed waveform probing.
EasyEDA (Available on EasyEDA)
Best for: Designing full schematics and moving straight to printed circuit boards (PCBs).
Why it’s great: It runs right in your browser, requires zero installation, integrates an open-source SPICE simulation engine, and lets you transition a successful circuit diagram directly into a physical PCB layout you can order.
Falstad Circuit Simulator (Available via Falstad Web Circuit Simulator)
Best for: Quick, lightweight conceptual experimentation in-browser.
Why it’s great: It’s a retro, incredibly fast Java/HTML5 applet loaded with classic examples. It visually animates current and voltage drops across passive components instantly without needing an account or installation.
If you share what you're hoping to build first—like an audio amplifier , an Arduino gadget , or just basic DC resistor math —I can recommend which of these tools to start with.
A visual, virtual breadboard where you place components much like you would on a real workbench. It's especially approachable if you want to experiment with Arduino boards, LEDs, buttons and simple sensors.
Great for: Learning practical wiring and getting started with microcontrollers.
A powerful SPICE simulator for studying how real electronic circuits behave. You draw a schematic, run a simulation and inspect voltage and current waveforms. It has a steeper learning curve than Falstad but is excellent for more serious experiments.
Great for: Amplifiers, filters, power supplies, transistor circuits and frequency response.
KiCad combines schematic design, circuit simulation through ngspice and printed circuit board (PCB) design. It's a good longer-term choice if you want to progress from virtual experiments to designing boards you can manufacture.
Great for: Designing complete projects that you eventually want to build.
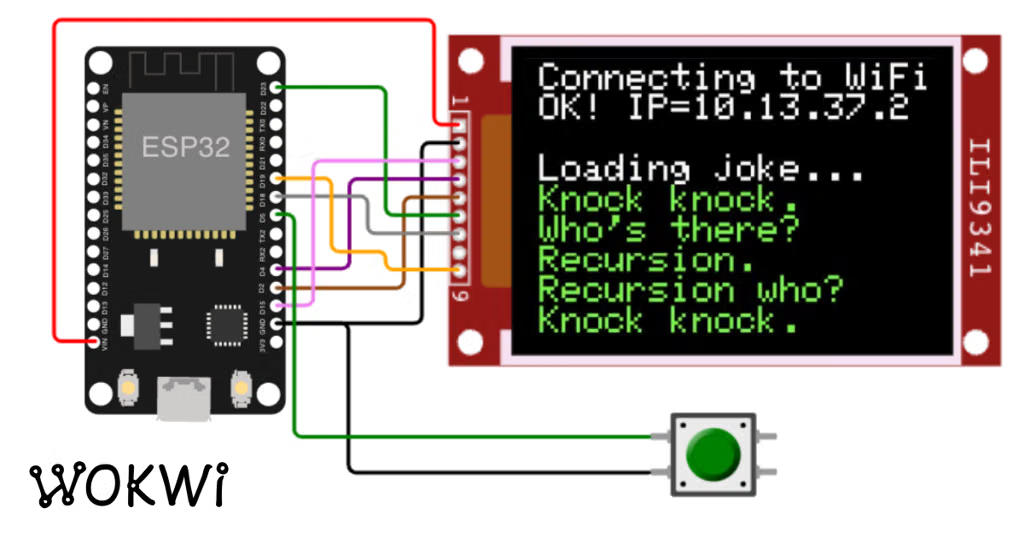
Wokwi focuses on microcontroller projects, letting you simulate boards, connect sensors and displays, and run embedded code without needing all the physical hardware.
Great for: Arduino, ESP32, Raspberry Pi Pico and sensor-based projects.
Try building a simple battery-and-LED circuit in Falstad:
Add a DC voltage source, a resistor and an LED.
Run the simulation and observe the current flowing through the circuit.
Increase the resistor value and watch the current decrease.
Reverse the LED and see how its behavior changes.
Replace the battery with an alternating voltage source and explore what happens.
This one experiment introduces voltage, current, resistance, polarity and circuit behavior.
One important note: simulations are excellent for learning, but their results depend on the component models and assumptions used. Eventually, compare your results with a real breadboard circuit.
My recommendation: Bookmark Falstad and start experimenting today. Once you understand the basics, move to LTspice for deeper analysis.
Type: Browser-based (interactive, real-time animation of current and voltage).
Best for: Absolute beginners who want to see electrons move through wires instantly without installing anything. It features animated voltage/current and a massive library of pre-built examples ranging from basic Ohm's Law to logic gates and radios. You can access it directly via the Falstad Circuit Simulator.
Tinkercad Circuits
Type: Browser-based (3D/2D hybrid with Arduino support).
Best for: Hobbyists who want to bridge the gap between pure electronics and microcontrollers like Arduino. It offers a friendly drag-and-drop interface where you can wire up breadboards with LEDs, resistors, and sensors, and even write code to test your circuits. Try it out at Tinkercad Circuits.
LTspice
Type: Desktop software (Windows/Mac).
Best for: Stepping up to industry-standard SPICE simulation. It is completely free, highly robust, and widely used by professionals and hobbyists alike to run transient, AC, and DC sweep analyses. It has a bit of a learning curve visually, but it's unmatched for precision. Download it from the Analog Devices LTspice Page.
Best for: Hobbyists who want to eventually turn their virtual circuits into real physical printed circuit boards (PCBs). It integrates schematic drawing, SPICE simulation, and a seamless transition to ordering cheap custom PCBs. Explore it on EasyEDA.
Would you like to know:
Which tool is best for learning basic theory versus building a real hardware project?
How to get started with a specific component like an Arduino or 555 timer in one of these simulators?
EveryCircuit : Known for its incredible visual feedback. It features a real-time animated engine that displays changing voltage, current, and charge directly on top of the schematic lines. You can turn knobs, flip switches, and adjust potentiometers while the simulation is actively running to see the circuit react instantly. It is available on the web and mobile devices.[](https://everycircuit.com/)
Multisim Live : A free, browser-based version of the industry-standard NI Multisim software used in engineering schools. It gives you a clean schematic-capture interface and allows you to run SPICE simulations without installing anything, bridging the gap between hobbyist tinkering and formal electrical engineering.
CircuitLab : An intuitive, browser-based schematic editor and mixed-mode circuit simulator. It provides clean presentation-quality schematics and allows you to run DC, AC, and transient simulations quickly without touching a single wire in real life.[](https://www.circuitlab.com/)
Would you prefer to start with a visual, breadboard-style simulator like Tinkercad, an animated theory simulator like Falstad, or are you looking to test code on microcontrollers like Arduino?
Absolutely! There are some excellent circuit simulation tools for students and hobbyists, ranging from interactive virtual breadboards where you can wire components together to professional-style simulators that visualize voltages, currents, and waveforms.
If your goal is to experiment, see what happens when you change a component, and understand why a circuit works, I'd start with a free, browser-based tool before moving on to more advanced software.
Best circuit simulators for learning
1. Falstad Circuit Simulator (CircuitJS)
(Best starting point)
Free · Runs in your browser · No account required
Great for seeing electricity in action. Moving dots represent current, colors indicate voltage, and built-in scope graphs show changing signals. You can edit component values and switch between example circuits.
Best for: resistors, capacitors, inductors, diodes, transistors, oscillators, and basic filters.
Build circuits on a virtual breadboard by dragging in components and connecting wires. It supports Arduino simulation and programming, making it feel closer to building a real electronics project.
Best for: LEDs, buttons, sensors, breadboard wiring, Arduino projects, and beginner STEM lessons.
Web · Android · iOS · Free access with paid options
A particularly visual tool: animated current, voltage, and charge appear directly on the schematic. You can change component values while the simulation runs and see the circuit respond.
Best for: learning interactively, experimenting on a phone or tablet, and exploring circuits made by others.
A more engineering-focused simulator. Draw a schematic, run simulations, and inspect voltage and current waveforms. It is useful when you want to go beyond visual intuition and investigate how a circuit behaves quantitatively.
Best for: transistor circuits, amplifiers, filters, power supplies, and more detailed analog analysis.
I'd recommend starting with Falstad and building a basic LED circuit. It teaches several fundamental ideas at once.
Try these experiments in order:
Change the resistance. Keep the battery voltage constant and increase the resistor value. Observe how the current and LED behavior change.
Change the supply voltage. See how current changes as you raise or lower the voltage.
Add a capacitor. Observe how it charges and discharges, especially when you switch the circuit on and off.
Build a blinking circuit. Explore how resistors and capacitors can create a repeating signal.
Compare your predictions with the simulation. Before changing a value, predict what will happen, then check the results.
One important distinction: these tools simulate circuit behavior, so they are excellent for learning, but real components have tolerances and limitations that idealized simulations may not capture.
One question to help narrow this down: What kinds of circuits are you most interested in experimenting with?
Best for: Professional aircraft aerodynamics, propulsion, and multiphysics.
Strong coverage of subsonic through hypersonic flow.
Mature turbulence modeling and complex-geometry workflows.
Integrated meshing, post-processing, and HPC capabilities.
Trade-off: Commercial licensing can be expensive.
Official site:
2. Siemens Simcenter STAR-CCM+
Best for: Industrial aerospace design and automated design studies.
Integrated CAD-to-simulation workflow.
Well suited to complete aircraft configurations and complex geometries.
Useful for parametric studies and design-space exploration.
Trade-off: Commercial licensing and a substantial learning curve.
Official site:
3. OpenFOAM
(Best open source)
Best for: Researchers, engineers who write code, and teams needing customization.
Free and open-source.
Flexible solvers and scripting for custom workflows.
Suitable for research, automation, and parallel computing.
Trade-off: More responsibility for solver selection, meshing, setup, validation, and troubleshooting.
Official site:
4. SU2
Best for: Aerodynamic optimization and computational design research.
Strong focus on adjoint-based sensitivity analysis and shape optimization.
Useful for airfoil and wing design, including compressible-flow problems.
Open-source and well suited to reproducible computational research.
Trade-off: Less of an all-in-one, guided commercial workflow.
Official site:
5. NASA FUN3D
Best for: Specialized aerospace research and high-performance computing.
Designed for advanced aerodynamic simulations and research applications.
Worth considering for high-fidelity aircraft and aerospace configuration studies.
Trade-off: More specialized setup and research-oriented workflows; less convenient as a general-purpose commercial design environment.
Quick comparison
Software
Primary strength
Cost model
ANSYS Fluent
General-purpose aerospace CFD
Commercial
STAR-CCM+
Automated industrial design studies
Commercial
OpenFOAM
Customization and research
Free, open-source
SU2
Aerodynamic optimization
Free, open-source
NASA FUN3D
Advanced aerospace research
Access restrictions may apply
OpenFOAM's official documentation confirms its free, open-source licensing and broad engineering applications. NASA describes FUN3D as a research-oriented solver with adjoint optimization and mesh adaptation capabilities.
Which should you choose for your application?
Aircraft wings, UAVs, and complete-aircraft aerodynamics
Start with ANSYS Fluent or STAR-CCM+ for an integrated commercial workflow.
Transonic, supersonic, or hypersonic aerodynamics
Fluent is a strong general-purpose option. For specialized research, evaluate FUN3D as well, particularly if you need advanced mesh adaptation or design optimization.
Rocket propulsion, nozzles, and aero-thermal analysis
Consider Fluent for broad multiphysics capabilities; compare other solvers against your specific combustion, real-gas, and thermal requirements.
Airfoil design and drag minimization
Consider SU2 for adjoint-based aerodynamic optimization, or Fluent if you prefer a commercial integrated workflow.
Academic research, custom solvers, and limited budgets
Start with OpenFOAM; add SU2 if gradient-based aerodynamic optimization is central to your work.
My final recommendation
If you need one primary CFD package for a professional aerospace engineering career, choose ANSYS Fluent. If you want to become a stronger computational aerodynamicist, pair it with OpenFOAM or SU2 to develop deeper skills in numerical methods, automation, and optimization.
One important caveat: software alone does not guarantee accurate aerodynamic predictions. Mesh independence, appropriate turbulence and transition models, boundary conditions, convergence, and validation against experimental or benchmark data matter just as much.
What type of aerodynamic analysis are you primarily working on?













































![Making a Game Box [Tim's Racer] - Tinkercad](https://images.openai.com/static-rsc-4/lZhSv16D3DwMmV-_amEbZDuRuuvIrdtQxlW6GVIsQlaHSM726vgFogGtY6pX7rOCUjuzkhYW2ZfXXbp18m3pIv0qo3kcsQRDq_Hb6DbujoTTgCXxiAdIy1ekZ_E0IxrSEzAIf05V0IBWQk8MtysZN4MJ7q5xbCRKNAdOn6rv7iBtztR2ZH9sZntRdB6GmllU?purpose=fullsize)


