Home first-aid kit creation
Jul 5 – Oct 26, 2026Updated Oct 26, 2026 Reviewed by Dimitry Apollonsky
Which brands AI mentions




Mentioned in
ChatGPTChatGPTGoogle AI ModeGoogle AI Mode


Widest split: Benadryl, 0% on ChatGPT and 43% on Google AI Mode.
- #1American Red CrossChatGPT 77%Google AI Mode 48%
- #2tiedMayo ClinicChatGPT 45%Google AI Mode 22%
- #2tiedBenadrylChatGPT 0%Google AI Mode 43%
- #4tiedEpiPenChatGPT 5%Google AI Mode 26%
- #4tiedAdvilChatGPT 0%Google AI Mode 26%
Questions and answers
Google AI ModeOct 26, 2026
Creating a custom home first-aid kit ensures you are ready for minor cuts, burns, scrapes, and unexpected medical needs. The most effective approach is to
gather core medical supplies, organize them logically, and maintain them regularly.Essential Supplies to Include
- Bandages and Gauze: Adhesive bandages (assorted sizes), sterile gauze pads ($4 × 4 inches), adhesive tape, and elastic roller bandages (Ace wraps) for sprains.
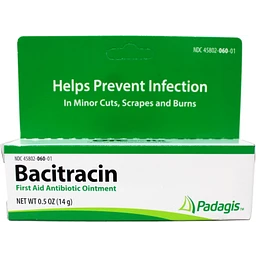
- Antiseptics and Cleaners: Antiseptic wipes, hydrogen peroxide or rubbing alcohol, and antibiotic ointment (like Bacitracin or Neosporin).
- Tools and Equipment: Medical scissors, tweezers, a digital thermometer, instant cold packs, and disposable nitrile or latex-free gloves.
- Over-the-Counter Medications: Pain relievers (acetaminophen or ibuprofen), antihistamines (diphenhydramine/Benadryl) for allergic reactions, and anti-diarrheal medication.
- Personal & Emergency Extras: A flashlight with extra batteries, an emergency blanket, a manual on basic first aid, and any personal prescription medications your household requires.
Steps to Build and Organize Your Kit
- Choose a Container: Pick a sturdy, water-resistant, and easily portable container (like a tackle box, a small plastic storage bin, or a dedicated zippered medical bag).
- Sort by Category: Group items into clear Ziploc bags or labeled compartments (e.g., "Wound Care," "Medications," "Tools") so you can find things instantly in a panic.
- Check Expiration Dates: Review over-the-counter medications and topical ointments every 6 to 12 months to replace expired items.
- Store in an Accessible Location: Keep the kit in a cool, dry place—like a kitchen pantry or main hallway closet—that is easily reachable for adults but safely out of reach of young children.
For a comprehensive checklist and recommendations on specialized items tailored to household safety, you can review the guidelines on the American Red Cross Anatomy of a First Aid Kit or the Mayo Clinic First-Aid Kits Guide.
Would you like me to:
- Tailor this list for pets or infants/children?
- Include items specific to severe weather or outdoor emergencies?
Let me know how you'd like to customize your kit.
ChatGPTOct 26, 2026
The best way to create a home first-aid kit is to start with a reliable basic checklist, add supplies for your household’s specific needs, and store everything in a clearly labeled container that’s easy to reach in an emergency.
The American Red Cross recommends keeping supplies together, checking them regularly, and replacing used or expired items. You can buy a ready-made kit and customize it, or build one yourself.
1. Start with this home first-aid checklist
For a household of four, the following is a practical starting point based on Red Cross recommendations.
Your shopping checklist
of checked
[Copy checklist] [Reset]
2. Customize it for your household
A good kit should reflect who lives in your home and the situations you’re most likely to encounter.
- For children: Add age-appropriate bandages, a digital thermometer, and any child-specific medicines with dosing instructions.
- For allergies: Keep prescribed emergency medication, such as an epinephrine auto-injector, accessible and within its expiration date.
- For older adults: Include essential medication information, spare glasses, and any needed medical supplies.
- For pets: Make a separate pet first-aid kit with gauze, bandages, a tick remover, and your veterinarian’s contact details.
- For common household injuries: Consider burn dressings, sterile saline, and extra gauze.
Keep medicines in their original packaging when practical, follow label instructions, and check with a pharmacist about which medicines are appropriate for your household.
3. Choose the right container and storage spot
Choose a container that is:
- Durable and water-resistant
- Easy to open quickly
- Clearly labeled with a first-aid symbol
- Large enough to organize supplies into separate pouches
Store it:
- In a cool, dry location
- Somewhere adults can reach immediately
- Away from young children and pets
- Away from heat, moisture, and direct sunlight
Tell everyone in your household where the kit is located. Keep medicines secured from children, and don't store supplies in a hot bathroom cabinet if heat and humidity could damage them.
4. Maintain the kit
Check it every 3–6 months
Look for expired medicines, damaged packaging, depleted supplies, and anything that needs restocking.
Keep an inventory
Put a checklist inside the lid and mark items when you use them so you can replenish them promptly.
Learn how to use the supplies
Consider taking a certified first-aid and CPR course. Having equipment is helpful, but knowing when and how to use it matters just as much.
The Red Cross also recommends including emergency first-aid instructions and replacing used or expired contents.
5. Don't confuse a first-aid kit with an emergency kit
A first-aid kit treats minor injuries and provides supplies for immediate care. A separate household emergency kit should contain drinking water, shelf-stable food, flashlights, batteries, essential medications, and emergency contacts in case of a power outage or evacuation.
Important: For severe bleeding, trouble breathing, signs of stroke, or another life-threatening emergency, call 911. A first-aid kit is not a substitute for emergency medical care.
For a detailed official reference, see the American Red Cross first-aid kit guide.
ChatGPTOct 16, 2026
The best approach is to build a well-organized home first-aid kit around common injuries and your household’s specific needs, rather than simply buying the kit with the most pieces. Start with reliable essentials, add appropriate medications and personal supplies, and keep everything easy to find when you need it.
A great starting point is the American Red Cross’s official guide, which includes a recommended supply list for a family of four.
1. Start with this essential checklist
Here’s a practical checklist for a home kit. You can use it to check supplies you already have or take shopping with you.
Home first-aid checklist
of checked
[Copy checklist] [Reset]
This checklist is a starting point, not a substitute for the more detailed Red Cross recommendations. For a household of four, the Red Cross also lists items such as two triangular bandages, a breathing barrier for CPR, and an assortment of sterile gauze and dressings.
2. Customize the kit for your household
- Children: Include child-appropriate bandages and age-appropriate medicines. Check dosing with a pediatrician or pharmacist.
- Older adults: Account for mobility needs, medical devices, and essential medications.
- Allergies: Keep prescribed emergency allergy treatments accessible and make sure family members know how to use them.
- Pets: Keep a separate pet first-aid kit and veterinary contact information.
- Outdoor activities: Consider extra supplies for insect bites, ticks, blisters, and minor burns.
Keep medicines in their original labeled packaging when practical, follow their storage instructions, and avoid including anything that household members should not take.
3. Choose the right container and location
Your storage setup should be:
- Clearly labeled and easy to carry.
- Divided into sections for wound care, tools, and medicines.
- Kept in a cool, dry place away from children.
- Known to every adult in the household.
- Accessible without searching through other emergency supplies.
Avoid storing the kit in a hot car or a humid bathroom if those conditions conflict with the storage instructions for its contents.
4. Keep it ready to use
- Inspect it every six months. Check expiration dates, packaging, and the condition of sterile supplies.
- Replace anything used. Restock after treating an injury rather than waiting for the next inspection.
- Learn basic first aid. Consider a certified first-aid and CPR course so you know how to respond, not just what supplies to use.
- Prepare for emergencies beyond minor injuries. Keep a separate household emergency kit with water, food, flashlights, batteries, and essential medicines for disasters.
5. The best guides to follow
1. American Red Cross — Make a First Aid Kit
Best overall guide for a home kit, with a recommended contents list for a family of four.
2. Ready.gov — Build a Kit
Best for expanding your first-aid supplies into a broader household disaster-preparedness plan.
My recommendation: Start with the Red Cross checklist, buy quality essentials rather than a huge assortment of questionable extras, and then tailor the contents to your household.
One important safety note: a first-aid kit helps with initial care, but severe bleeding, difficulty breathing, chest pain, or signs of a stroke require emergency medical assistance.
Sources cited in this answer5
Google AI ModeOct 16, 2026
Creating a home first-aid kit is easiest when you build it around a reliable standard—like the guidelines from the American Red Cross —and then customize it for your household.
The best approach is to assemble the core essentials yourself or buy a pre-made base and supplement it.
1. The Core Checklist (Standard Essentials)
A well-stocked family kit should cover cuts, scrapes, sprains, and basic medical evaluations.
- Bandages & Wraps: 25 adhesive bandages (assorted sizes), 2 absorbent compress dressings (5 × 9 inches), sterile gauze pads (3 × 3 and 4 × 4 inches), 2 roller bandages (3-inch and 4-inch), and 2 triangular bandages.
- Tapes & Tools: 1 roll of adhesive cloth tape (10 yards × 1 inch), medical scissors, and tweezers.
- Antiseptics & Ointments: 5 antibiotic ointment packets, 5 antiseptic wipe packets, and 2 hydrocortisone ointment packets.
- Protection & Diagnostics: 2 pairs of non-latex gloves, a CPR breathing barrier (with a one-way valve), an instant cold compress, and a digital oral thermometer.
- Reference: A physical first-aid instruction booklet.
2. Over-the-Counter (OTC) Additions
Store-bought kits often skip medications, so you should add these based on your family's needs:
- Pain & Fever Relievers: Acetaminophen (Tylenol) and Ibuprofen (Advil/Motrin).
- Allergy Relief: Oral antihistamine (like Diphenhydramine/Benadryl or Cetirizine/Zyrtec).
- Stomach Relief: Antacids or anti-diarrheal medication.
3. Personal Customization
Tailor the kit to the specific people living in your home:
- For Kids: Pediatric dosing charts, children's liquid pain relievers (with a proper dosing syringe), and fun character bandages (which surprisingly help calm distressed children).
- For Pets: Pet-safe antiseptic, a digital thermometer, and a secondary muzzle just in case an injured pet panics.
- Prescriptions: Keep a written list of emergency contacts, medical notes, and backup doses of critical daily medications if appropriate.
4. Storage & Maintenance Strategy
- The Container: Choose a sturdy, water-resistant, clearly labeled box or small plastic bin with a handle. Make sure everyone in the house knows where it is (typically a central location like a kitchen or hallway linen closet, out of reach of young children).
- The Routine: Set a calendar reminder every 6 months to check expiration dates on ointments and OTC medications, and replenish anything you used during minor household accidents.
Would you like help tailoring this list for specific needs , such as preparing for infants, pets, or outdoor/travel use?









Also asked as
- What is the most effective method for setting up a home first-aid kit?